Assumptions
- You have two or more Windows 10 devices connected via a private network or subnet.
- You have installed Invoice 360 Enterprise Cloud Sync Server on one PC/device and Invoice 360 on another PC/device.
Start Invoice 360 Enterprise Cloud Sync Server
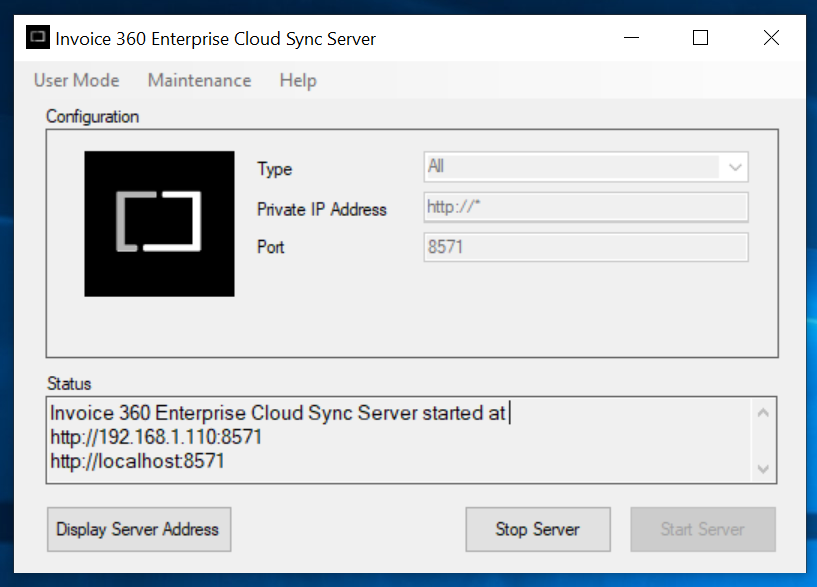
1. On the PC/device that you have installed the Invoice 360 Enterprise Cloud Sync Server, Right Click on the Invoice 360 Enterprise Server and select "Run as Administrator".
2. Use the default values and click on "Start Server". Invoice 360 Enterprise Cloud Sync Server will start listening on your private IP addresses and localhost. This enables Invoice 360 running locally (on the same device as the cloud server) or remotely (on a different device as the cloud server) to sync with Invoice 360 Enterprise.

Setup Invoice 360
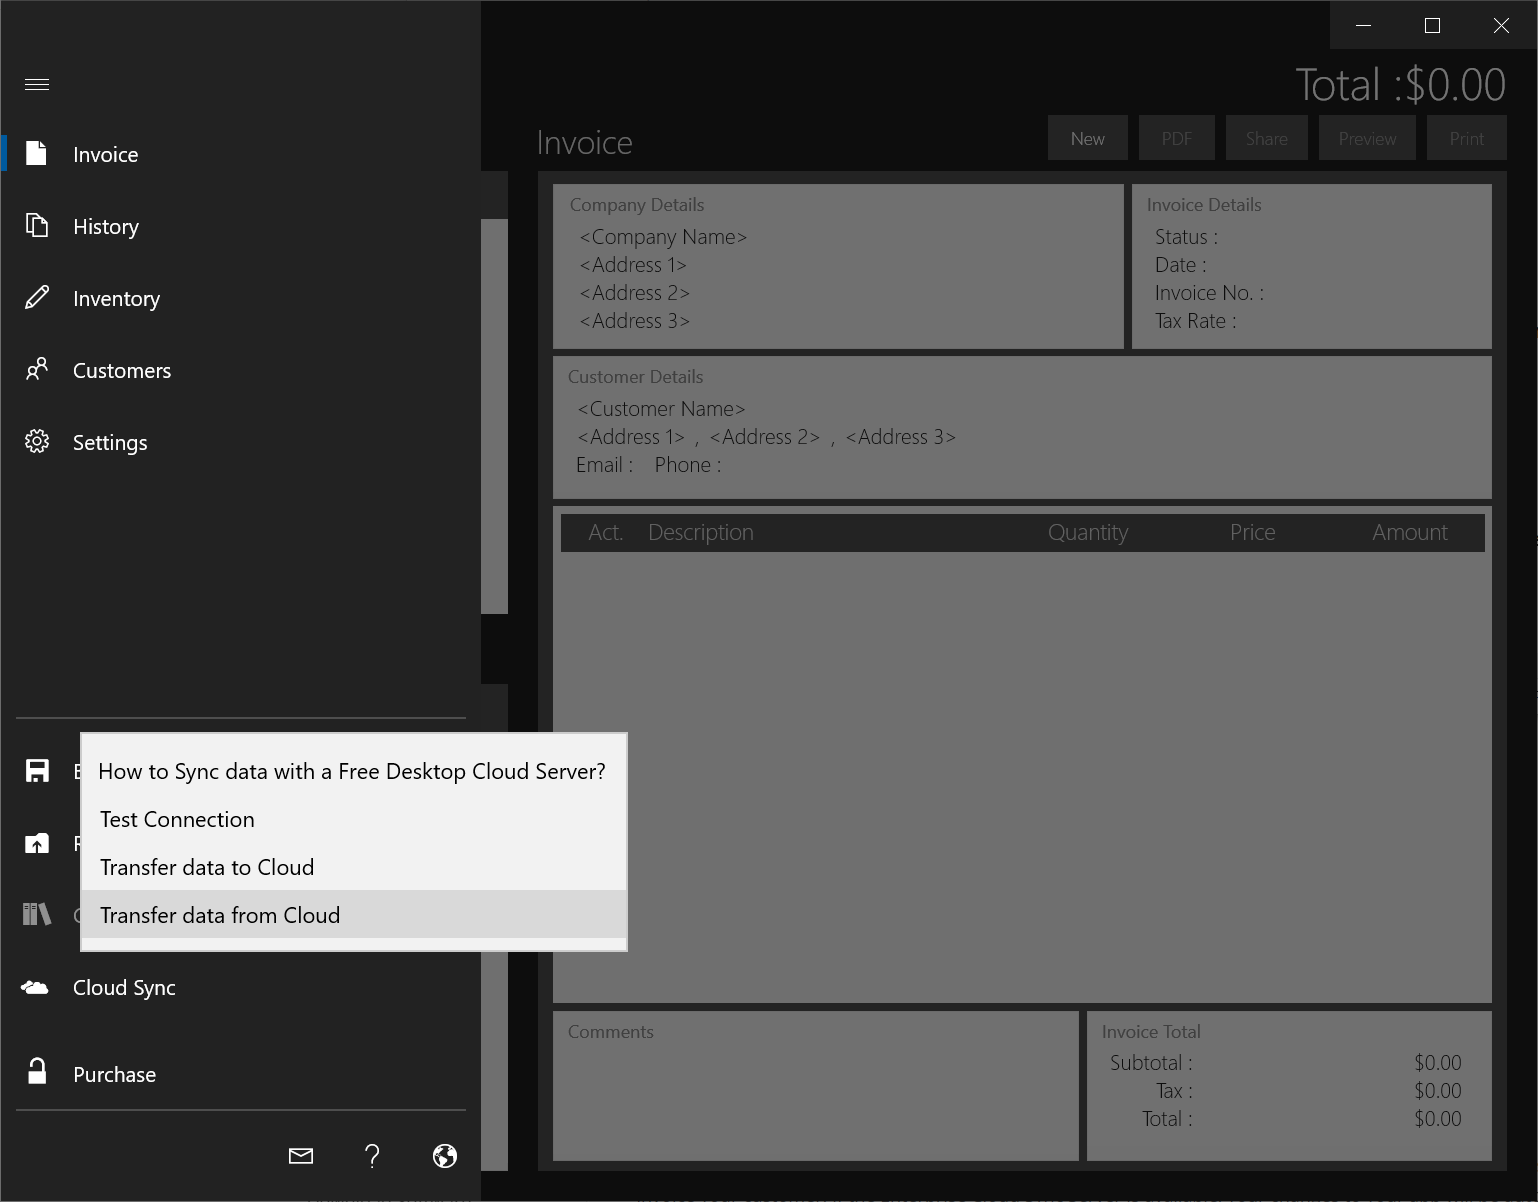
1. Launch Invoice 360. Click on the "Hamburger" button, select "Cloud Sync" and click on "Transfer data from Cloud".

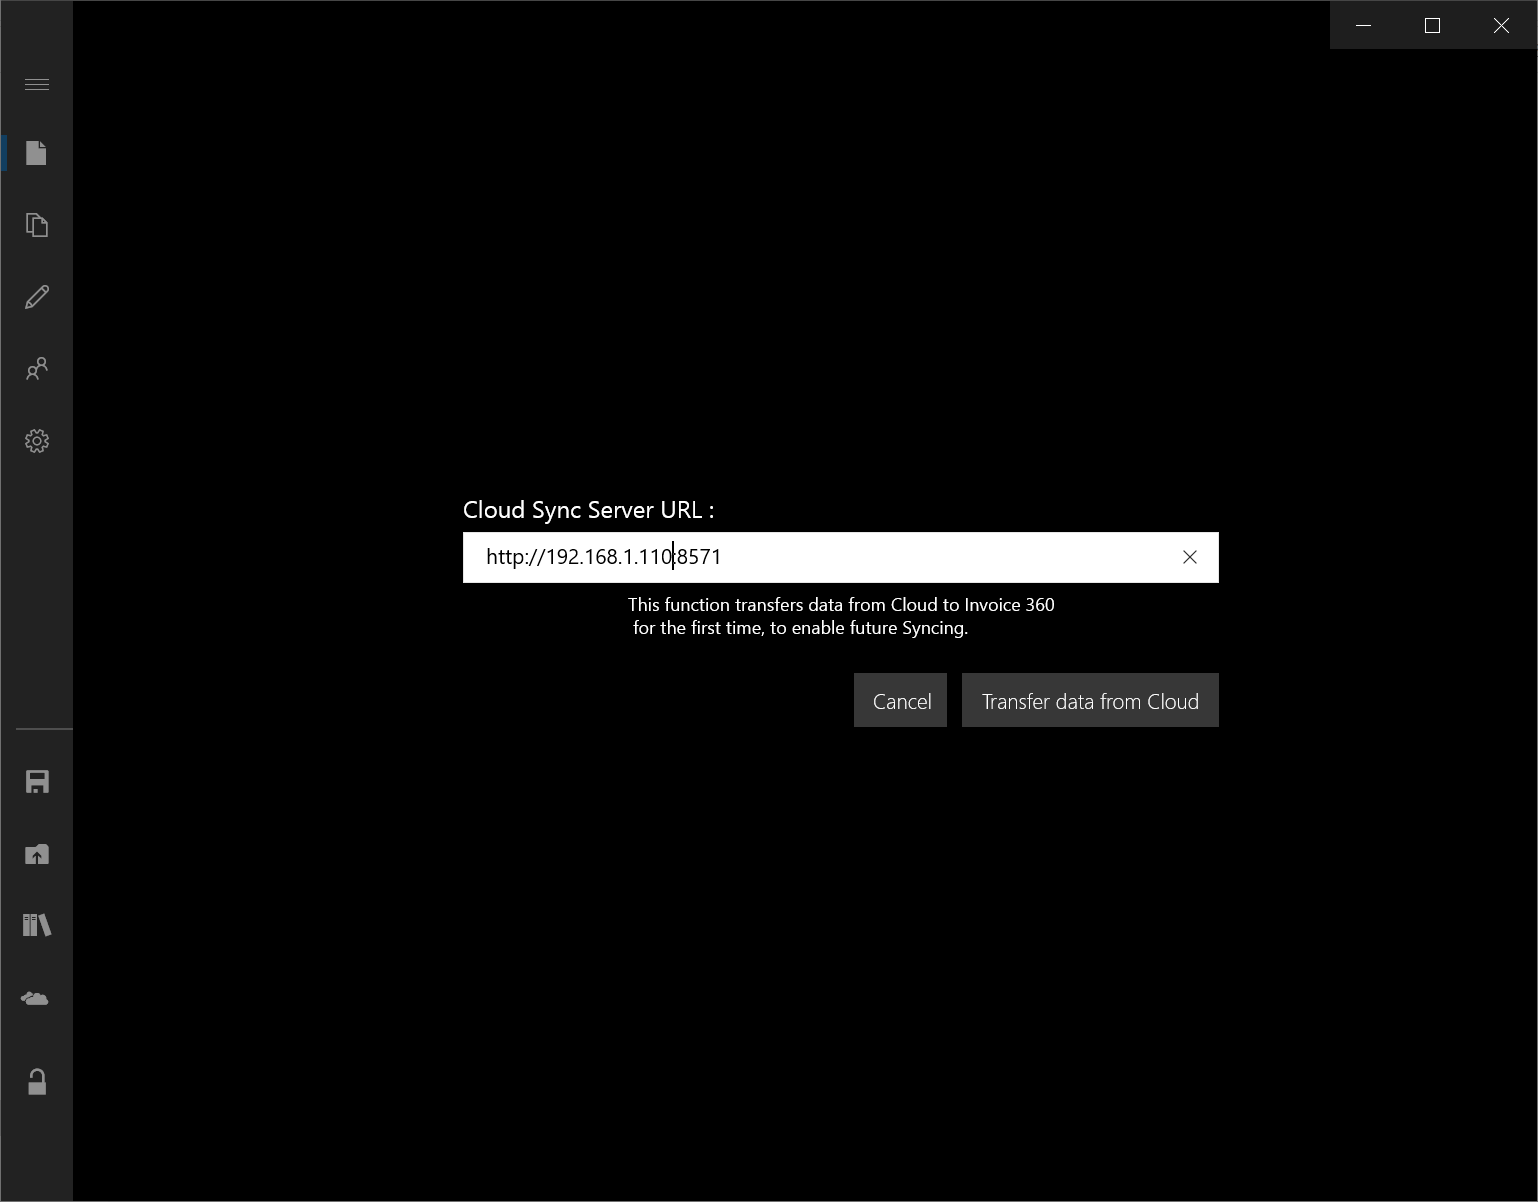
2. Enter the address of your Invoice 360 Enterprise Cloud Sync Server. The address to use can be found in the user interfaces of Invoice 360 Enterprise Cloud Sync Server. For example, http://192.168.0.11:8571 or something similar. Click on the "Transfer data from Cloud" button and Invoice 360 will bootstrap itself with the data from the cloud server.
Select "Yes" when prompted to "Let Invoice 360 access your name, picture, and other account info?"

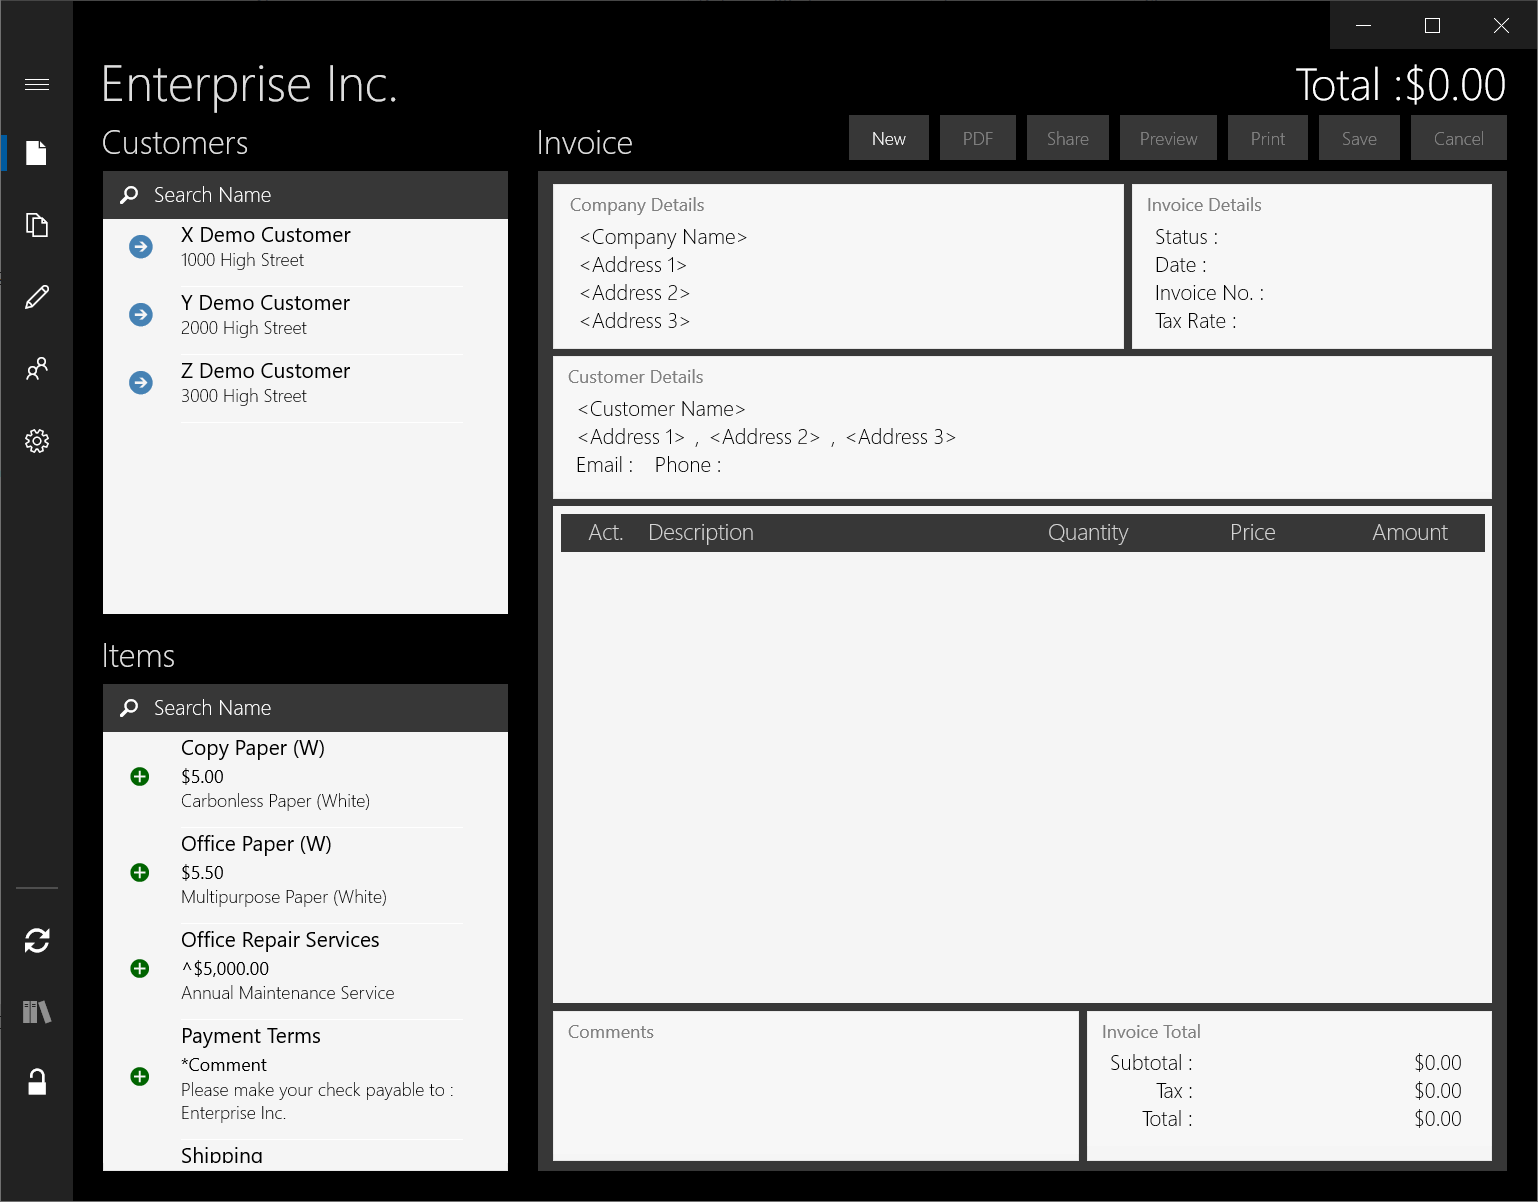
If you see the following screen, you are ready to start using Invoice 360. Any changes made will automatically sync with Invoice 360 Enterprise.

You have now successfully bootstrap Invoice 360 on a remote PC/device. You can use this PC/device to invoice your customer. If the cloud server is available, your changes to your app will be automatically sync with the server. If you are not connected to your private network or if your server is not available, the app will continue to work but the changes will not be immediately synced to the server. You can later tap on the Sync button in the app to manually trigger the syncing process.
