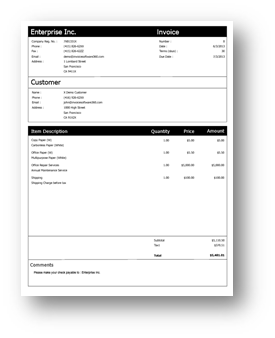
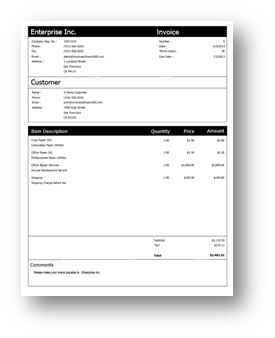
How to use the templates here in Invoice 360 (or Invoice 360 Enterprise)?
- 1. Download the Invoice Template to the Windows Documents folder. For a PC, right Click on the "Download (Desktop)" link & "Save Target As". For a Tablet, tap on the "Download (Tablet)" link, open and unzip the file to the Documents folder.
- 2. Launch Invoice 360 and go to the Settings screen. In the "Template Design" section, tap on the "Import" button and select the downloaded template (".xml"). The custom template will be added to Invoice 360.
- 3. Finally, you can select the imported template, save the Settings and proceed to the Invoice screen to print invoices with this new template. You can further customize the templates using our Free Invoice Template Designer below.
See all templates in our Invoice Templates Gallery.
Black Teal Templates
Invoice Template Designer - Free
We provide an invoice template designer - Invoice 360 Template Designer, on the desktop so that you can create your own invoice template, if you do not wish to use an existing template that comes with the product. Once you create your own invoice template, this template is ready for use on our Invoice 360 app immediately.

Invoice Template Designer (Desktop) to Invoice 360 (App) to Physical/Electronic Invoice
Tutorial of creating an invoice template and loading it into Invoice 360 app
-
1. Download, install and launch the Invoice 360 Template Designer from Windows Start Menu.
-
2. Select A4 Size (or Letter) as the Paper Size and click Create. The Invoice Template option allows you to select a template in the Invoice 360 app to start with.
The Units field allows you to specify to use Inches, Millimeters or Centimeters as the unit of measure when designing the invoice template.

-
3. The following template is created. Change the layout of the fields if required. Or add/remove any fields from the Invoice Template. For this demonstration, we are just going to add an image.

-
4. Click on the Ribbon->Insert->Image from File. You can also choose to import an image from the Scanner if required.
-
5. The mouse cursor will change to allow you to select the location of the image. Select the portion below the invoice details. A dialog will pop up to allow you to choose an image. Select the image and click OK. In our case, we have selected a "Croissant" image as shown in the diagram below.

-
6. Now click on File->Generate Invoice Template. You can save the file as any name, in our case we are going to call it "MyTemplate". A file "MyTemplate.xml" will be generated. It contains all the layout of the fields and the images embedded
into the XML file.
-
7. Copy "MyTemplate.xml" to the Windows 8 Documents folder.
-
8. Next launch the Invoice 360 app and go to the Settings screen. In the "Template Design" section, tap on the "Import" button and select "MyTemplate.xml".
This custom template will be added to the Invoice 360 app.
-
9. Finally, you can select the imported template, save the Settings and proceed to the Invoice screen to print invoices with this new template.
Notes on using the Template Designer
Address Field
The Invoice 360 app and Template Designer support address in a 3 Line format. This enables you better control over how address is displayed on your invoice.
- <Address 1>
- <Address 2>
- <Address 3>
Line Items
In the Template Designer, there is no need to repeat the Line Items. You only need to specify the line item once as shown in the diagram below. The Invoice 360 app will automatically populate different line items in separate rows.

Comments
The Invoice 360 app and Template Designer support 3 general comments field. The comment fields are useful for general purpose comments or reminders. For example, Check payment information.
- <Comment 1>
- <Comment 2>
- <Comment 3>
In the designer, you can designate where these comment fields are located on the invoice.

In the app, you can create Comment items in the Inventory screen. These Comments items will appear in the Items List - highlighted by the red box on the Main Invoice Screen below.

The Comment items can be searched or easily identified as "*Comment". Tapping on a Comment item, in the list, will add the Comments into the comments area (highlighted by the orange box) on the Invoice.

When this invoice is printed, the Comment field will automatically appear at the location where you have designated in the Invoice Designer. This can be anywhere on the invoice. By making good use of the comments field, you can further optimize and shorten the time of an invoice creation.
Tax, Second Tax and Shipping After Tax
The following set of fields as shown in the screenshot below, if added to an invoice template, have the additional option of being toggle on or off in the Invoice 360 app Settings screen.
For example, if Tax 2 is toggled Off in the app, the SecondTax and SecondTaxDescription field in the invoice template will not be displayed in the actual invoice when printed.

Designing a Multi-Page Invoice Template
An invoice template is divided mainly into two sections, the main
section and the footer section. A line, known as the footer line , is
used as the demarcation between these two sections.


